IRF
-
Posts
5,118 -
Joined
-
Last visited
Everything posted by IRF
-
I should say that I had to sacrifice a life in 'Attack of the Mutant Telephones', because I went round and then realised that I had left one item uncollected which I couldn't then reach in order to complete the cavern. I had been playtesting on QAOP which seems to preserve only the most recent rollback point, and I had used rollback at a point in Mutant Telephones which was 'past the point of no return'. So whilst elsewhere I managed to complete the screens without loss of life via Rollback, in the Telephones cavern I wasted a life. The upshot of this is that my final score will be slightly inflated by the fact that I collected all the items in Mutant Telephones twice (bar the one item which I couldn't reach first time round). It would be possible to inflate the completion score more significantly, if you triggered Kong falling in one of the Kong screens (and collected all the items) and then sacrificed a life before reaching the portal - and if you did that for all of your lives bar the last one. Idea: It might be possible to avoid that scenario if you could 'roll back' the accrued score every time you lost a life to the score which you had upon entry to the current cavern. That way, the final score would truly represent how efficiently you completed the game, and it would not be skewed by losing lives and partially repeating caverns.
-
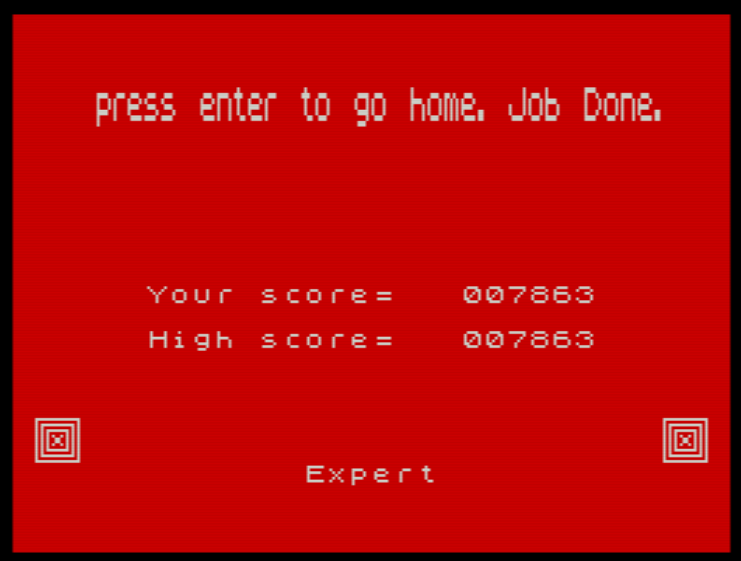
Completed the latest version in Expert mode. Better score than last time. :) I presume the bonus points available for making the red UFO fall on the final screen are fewer than for the Kongs, because the UFO doesn't descend as far from its initial position?
-
Andy, please re-download the 'Gloomy Cavern' snapshot (from the post three above this one), as I've edited it again to fix a problem.
-
The area immediately in front of Willy is illuminated by his headtorch, so appears as normal (conveyor green, Central Cavern guardian yellow, etc). Whilst the rest of the cavern (that isn't directly in Willy's field of vision) is gloomy and only visible in non-BRIGHT blue INK on a black PAPER background. It makes the game a bit easier because you can see where the guardians are, but it still adds more difficulty compared with the original MM, because it's harder to distinguish the crumbly platforms from the solid ones, and the portal only FLASHes when Willy is in close proximity to it. EDIT: I've just noticed that not everything is right though - in 'Attack of the Mutant Telephones', the wall/ceiling [and portal] at the top left doesn't stay visible in gloomy blue INK. :unsure:
-
One more POKEs seem to do the trick! Try POKE #9378, #01 (or POKE 37752,1 in the antiquated decimal system). Like Norman Sword's POKE, this should be applicable to both the Bug-Byte and Software Projects variants of the game. If you only apply the above POKE, the cavern is revealed as you explore, but then the parts you have seen stay revealed. In conjuction with Norman's POKE (#9365,#70 or 37733,112), the whole cavern is shown in black PAPER / blue INK throughout, except the cells in close proximity to Willy at any given time, which are revealed in their 'proper' colours whilst he is nearby. EDIT: Both of the above POKES are applied in the attached snapshot. Makes things a bit easier! FURTHER EDIT: Following discovery of additional glitches, it turns out that eight more POKES are needed to completely implement the alternative 'gloomy cavern' effect (so that's ten in total): POKE #9417, #01 POKE #941E, #01 POKE #9421, #01 POKE #9424, #01 POKE #9427, #01 POKE #942E, #01 POKE #9435, #01 POKE #943C, #01 I don't pretend to completely understand how this works! :blush: :D Gloomy Cavern.sna
-
Making full use of Matthew's original tune data: The original Manic Miner title screen tune consists of pairs of note pitch values (alongside a duration byte). In most cases, the pitch values just differ by a value of 1, which yields a 'slightly dischordant' note of around that pitch. But there are a few pairs of pitch values which differ by a significant amount, to yield a 'chord' of two distinct notes played together. In Andrew Broad's MM->JSW conversion (which I only subjected to minor tweaks in the file that I previously uploaded, unlike my more substantial intervention with the JSW->MM conversion's tune), Andrew took all of the first pitch values for each pair of notes, and put them through the 'octave-shift modulation' effect from the JSW game engine. In the attached file 'The Blue Danube in JSW style - Alternative notes', I have gone through all the notes in the title tune, identified where there is a 'chord' in the original Manic Miner 'Blue Danube' score (pairs of pitch values which differ by a larger value than 1), and used the 'alternative' note pitch value (i.e. the second value in the pair, as listed in the original MM score). For example, the first phrase of the Blue Danube (as originally scored by Matthew, for the MM game engine) is comprised of the following pairs of pitch values (these are in hexadecimal; I have omitted the duration bytes for clarity): 80 81 66 67 56 57 56 57 AB CB 2B 33 2B 33 AB CB 33 40 33 40 AB CB The equivalent data for the rendition of Blue Danube in the JSW engine, as can be heard in Andrew's MM->JSW conversion, consists of a single pitch for each note, as follows: 80 81 66 67 56 57 56 57 AB CB 2B 33 2B 33 AB CB 33 40 33 40 AB CB In the attached 'Alternative notes' file, I used the following values: 80* 81 66 67 56 57 56 57 AB CB 2B 33 2B 33 AB CB 33 40 33 40 AB CB (*In both 'The Blue Danube in JSW style' and 'The Blue Danube in JSW style - Alternative notes' files, I actually used a value '00' for the very first note - Bottom C instead of Middle C - to try and replicate the way in which the tune starts off slowly in original MM. Since it isn't possible to specify notes of different duration in the JSW engine, that seemed the best way to try and achieve a similar effect.) ** It would be good to try and play both title tunes from the two files simultaneously, if that were possible with two emulators running at the same time - you would end up with a title tune that has the character of both the MM and the JSW theme tunes! (i.e. chords punctuating the tune, and the doubling-octave modulation.) The Blue Danube in JSW style - Alternative notes.TAP
-
Once properly executed, Norman Sword's tweak to Pgyuri's original idea should give the right level of added difficulty without making the caverns pseudo-impossible. e.g. With everything highlighted in blue INK on black PAPER, you'll be able to track the movements of guardians, but the distinction between solid and crumbly platforms will be less obvious until you are on top of them (with the crumbly ones crumbling away!) **** I wonder how difficult would it be to make the Solar Power Generator a special case cavern, with the solar beam being visible throughout with a 'highlighted' zone either side of the solar beam similar to the lit up area in front of Willy?
-
I take it that comment was in response to the initial file by Pgyuri? Norman Sword has attempted to create a more playable version (see attachments three posts above this one), which have a 'gloomy but still visible cavern' effect. However, that effect doesn't sustain itself for the duration whilst you try to play through the cavern, so I think that it needs another tweak. (I'm sure Norman will come up with something in about five minutes after he's read this. :) )
-
Good stuff Norman, although there is a quirky thing going on whereby the cells behind Willy are drawn in black INK, meaning that you can move around progressively 'erasing' the cavern as you go - see the attached recording. By the time Willy reaches the portal at the end of the Central Cavern, the whole cavern has reverted back to how it is in the 'Dark Light Modification', and your initial 'gloomy blue cavern' effect has been erased! Erase the Cavern.rzx
-
I note that '6031769'* works, so you can easily access/explore all the caverns - including the ones with non-black PAPER air/backgrounds. :-) (*In the Bug-Byte version; presumably TYPEWRITER also works in the Software Projects variant although I haven't tried that.) I did wonder whether more of the cavern might get illuminated in the Solar Power Generator, because of the Solar beam. But it seems not.
-
One suggestion - for consistency, shouldn't the Descending Boot on the Game Over screen suddenly appear above Willy's head the moment before impact (rather than the player being able to see the full trail of the extended leg)? Also, maybe everything should go black shortly after he's been squashed? - representing his lamp being snuffed out! :lol:
-
That's a cool effect, and very in keeping with the 'mining' theme! It took me seven lives just to complete the Central Cavern! I found that dropping off the centrally-placed brick wall onto the conveyor, and then pressing (and keeping) the Right movement key to hold Willy in place whilst waiting for the yellow robot to appear, gives you an extra cell of 'forward vision', and that helped to get the timing of the jump over the robot right. Most of my lives were expended trying to remember exactly where the overhead stalactites, poisonous pansies and underfoot crumbly cells are on the top platform. I'd say that without a good advance knowledge/mental map of where the hazards are located, this game would be extremely difficult!
-
Something I meant to ask before - is there a teleport/cheat function which allows you to skip to a chosen cavern? (Similar to '6031769' in the original MM). I imagine it would be useful for you to be able to go straight to the new cavern to playtest it, for example.
-
You have me convinced - all the more reason why it's good that the bug was spotted and rectified.
-
But if I understand this correctly: ... It is only the bottom three pixel-rows of the switch that can kill Willy, because only those three pixel-rows change when the switch is flipped. So in a scenario where Willy is on the descent phase of a sideways jump, and falls through the switch cell, his legs will enter the upper part of the switch first (at most, the top four pixel-rows of the switch), therefore his legs won't reach the 'switchy' part of the switch until the next time-frame of the game, when the 'flip' has already happened and the potential for a collision has passed. So the fatal collision wouldn't occur in that circumstance. (It's a purely academic point anyway now that you've fixed the bug!)
-
If you fell onto a switch from above, wouldn't it behave like a floor tile and arrest Willy's fall? So he would end up standing on it rather than being killed (unless he had fallen from a fatal height of course). **** Something which I meant to mention the other day - though this is a moot point now that you've fixed the problem - is that I managed to take a couple of shortcuts in the 'spiral' room by bouncing off the spiky bush nasty cells, so that I completed the screen without going all the way around the spiral (this was only possible in Trainer and Normal modes, since instant death follows contact with a nasty in Expert mode).
-
The Final cavern is actually an excellent example of one in which you need to collect the various items in a certain order, if you want to complete it in Expert game mode AND get the bonus points which are available!
-
I knew my memory was a bit hazy! Andrew, am I right in thinking that you did interview Matthew Smith yourself, on another occasion?
-
I just reached the last cavern again, and this time I managed to activate both switches. Both of them can indeed kill Willy if he strikes them at the wrong angle, as suspected. But your fears about Willy being killed if the lower half of his body pixel-collides with them proved to be unfounded. I suspect that's because the check for whether Willy has touched a switch only compares the attribute coordinates of the upper half of his body with the coordinate of the switch. (If you walk through the lower switch in the final cavern by proceeding upstream along the conveyor directly beneath it, such that Willy's legs pass through the switch, the switch does not get flipped.) That final cavern is actually bloody difficult to complete this time, now that I am trying to make the 'Kong' fall to collect the bonus points AND exit the cavern safely!
-
My latest investigations have crossed with your last post, Norman. But I just confirmed that the second switch in the second Kong cavern can in fact kill Willy if he hits if at a certain angle. I suspect that the first switches in both Kong caverns would also, in theory, be fatal if Willy pixel-collided with them before they are flipped. But the place in which the first switches in both caverns are located means that Willy has to jump sideways at them, and from such a position that his attribute coincides with the switch (flipping it, and making it harmless) before any of his pixels (in fact, his headlamp) can collide with any pixels in the switch. So no fatal outcome there. I hadn't thought to check whether the switches in the final cavern can kill him if he pixel-collides with them.
-
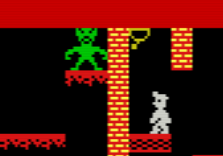
A vertical jump if Willy is further left kills him too. Whilst I managed to do a left-to-right jump and flip the switch without dying. It seems that it's not a difference between vertical versus sideways jumping. Rather, it's a question of whether or not one of Willy's pixels touches a pixel of the switch. If he starts off facing left in the rightmost frame of animation within the pair of cell-columns bounded by the two blocks either side of the switch (see attached screenshot), then when he jumps straight up, his attribute coordinates enter the cell containing the switch, but his pixels don't touch the switch's pixels, so the switch is flipped safely. As you've discovered, once the switch has been flipped, Willy can pixel-collide with it without harm.
-
Norman, please see the attached. Recording of the mysterious behaviour of the right-hand switch in the first Kong cavern, as well as a snapshot taken just before the recording was made (so you can try it for yourself). What can explain the sudden death when Willy touches the switch? The first (left-hand) switch didn't kill him (obviously, or else I wouldn't have been able to reach that position in the first place to touch the second switch). Kong Switch Unexplained Death.rzx Kong Switch Unexplained Death.z80
-
Anyway, I'll do a recording of Willy being killed by the switch in the first Kong cavern so you can see what I mean.
-
Nothing to do with Kong then, but I'm still not sure why Willy is apparently killed when he touches the right-hand switch in the first Kong cavern? (In Expert mode)