Norman Sword
-
Posts
628 -
Joined
-
Last visited
Everything posted by Norman Sword
-
Provisional music, which will more than likely stay. : old file attached here - deleted - down loaded 4 tiles --------------------------------------------------------------- Final game version accessible via This Link
-
Did you miss that statement.
-
Nothing to do today---- so i wrote the music. --------------------------------------------------------------- Final game version accessible via This Link
-
Back to the theme of playing around. I wrote the screen copy basics, when I was showing how I would display Perils of Willy. Those screen copy basics were modified into JSW128 VL demo . And expanded again in JSW128VM Using the screen copy routine that was eventually written for JSW128VM. I expanded the data and added some sprites. I designed and wrote a sprite draw routine, and then added my own sprite movement routines. I then added keyboard routines and fleshed it out with a game control part. All this code is new. It was at this point a few days down the line, that I encountered a major problem in the design of the overall program. Up to this point the movement of graphics and the speed of screen update was ok. However as I added more and more routines it became very noticeable that the stack copy was having a serious problem with regards how it updated the screen. The bigger screen was introducing a phase lag across one raster line and only one raster line. The Glitch this introduced had not been noticed before, and once it was noticed i could not carry on and leave it. At first I puzzled over the nature of the glitch, but eventually I worked out the exact nature of what the problem was. The extra size of the screen was just enough to render the method used as unworkable as far as I was concerned. I wrote several differing versions of the stack copy, and the problem would seemingly not go away with the fastest methods I could write. The problem was not speed but the method of implementation. I could cast aside the method I was using and write a bigger routine that used more data. Or use a true raster line stack copy via the Ytable. The problems become the negation of speed with repeated look ups of data or the vast amount of data and space needed for rolled out stack copies - None of these were to me an option. So after about four/five days from the start of doing these routines and having a working couple of rooms to play. I contemplated pulling the plug. The glitch that I was seeing was not acceptable to me. The update method had a serious flaw, and I was struggling to overcome this flaw. By the end of the first week, I was about to give up. I decided to scrap the method I was using. My assembler was now littered with dozens of switches and options that implemented various differing methods of stack copy. I tried a new method and copied a lot of macros across and changed the basic method I was implementing. It seemed like every other block of code I had written. I knew the method was not as fast. Yet when I assembled the code and ran it. The glitch had gone. Which proved it was the method implemented originally that was wrong and all the updates and changes could and did not fix it. I added a few more rooms and then added game control. By the end of the 2nd week I had more or less what is seen in these demo's. What I have done in the weeks since is refine the code and re-write some of the routines. In some ways I wish I had not written every routine from scratch. It was just easier to say to myself, what do I want. Then write the routine. It seemed pointless using someone else's code that did not do what I wanted. As an example:- name a version of JSW that permits sprites to cross the background. The only answers that I am aware of are JSW2 and JSW2+, the third answer is JSW128VM. I knew from JSW128VM that it was not an easy change. And I also knew from JSW128Vm that the changes in that version did not go far enough. The whole sprite usage in JSW2 and JSW2+ was sufficiently different, that I could ignore that. So in the end it was just quicker to write all my own routines. The stoppage at this point concerns implementation of Music. Not something I can do. I can write any number of music routines and play the music in my own routines. But I do need a simple file to implement the music as data, along the lines of O3fs,o3e,o3e,o3f,o3a Which reads as Octave 3 F sharp, octave 3 E, octave 3 E, Octave 3 F and finally octave 3 A. Given a music score in the fashion written above I can happily write the music routine. Asking me to write this file myself is not going to happen soon. --------------------------------------------------------------- Final game version accessible via This Link
-
The biggest versions of JSW in 48k are in descending order JSW2+ around 147 rooms - expanding the game +83 rooms JSW2 around 134 rooms - expanding the game +70 rooms JSW128 VM 128 rooms - expanding the game +64 rooms then the next best is around 75 rooms - expanding the game +11 rooms. JSW 60 rooms designed to store 64 expanding the game -4 rooms
-
Plodding along, writing various versions. Each new version with an inclusive compression routine for the data. The data is already compressed into nibbles and the various room sizes are creating problems. The problems stem from the amount of code needed to compress and then expand a room that does not have a fixed size. The normal course for me, would be to write a program that compresses the data and then outputs a file that I can assemble in my assembler. This means the program only stores the compressed data, making it very difficult to change by anyone but me. I have decided in this version to leave the data stored as nibbles. Then after loading the program will compress the nibbles data and then discard it. This does in theory make the data editable using a simple hex editor. The compression of the data is handled by the program, so the compressed data does not need to be edited. This does mean that only the raw file is editable, but that is still better than editing the compressed data. I know that the data compression on JSW2 was handled by a few lines of basic code. That is code written in CPC Basic. Each room was designed and then sent from the CPC across to the Tandy as a file containing data statements. If the file needed changing the room would need to be redrawn and sent again to the Tandy or the compressed data would need to be edited. In some rooms the redesign, only needed an odd byte changing. Perhaps after finding a platform needed extending or shortening. So it was quicker to edit the compressed data. That is why some rooms are not optimised as well as they could be. The above is the reason I am trying to keep the data in a simple format. So that simple edits can be performed without resorting to editing compressed data. The rooms are drawn by me in hex. I want to keep that simplicity. On the other hand I could forget about doing any of the above and just carry on with the very limited memory available. --------------------------------------------------------------- Final game version accessible This Link
-
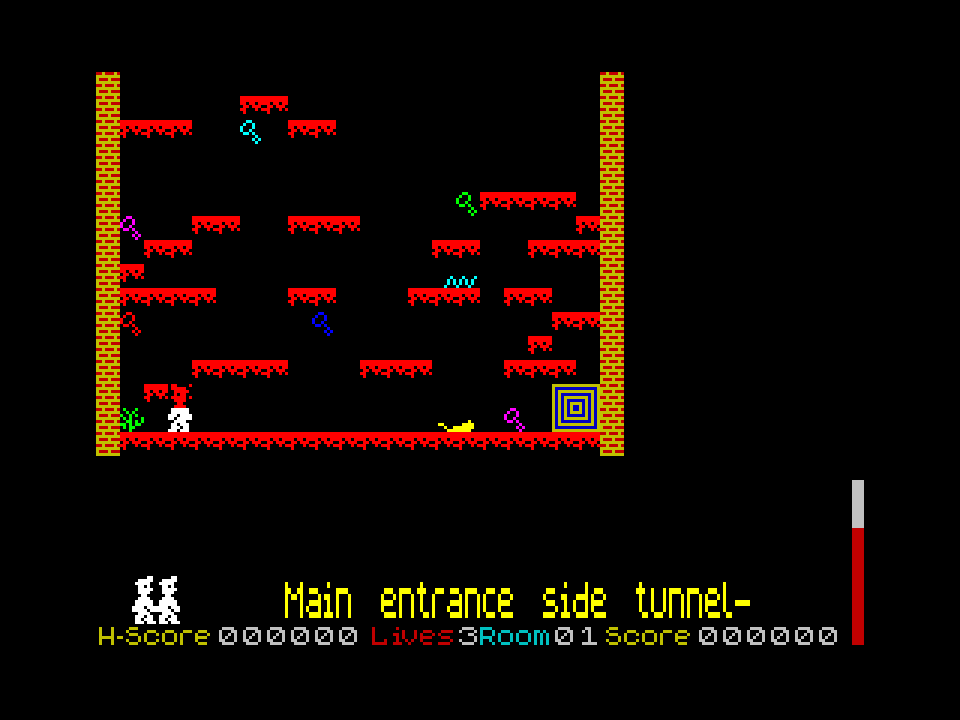
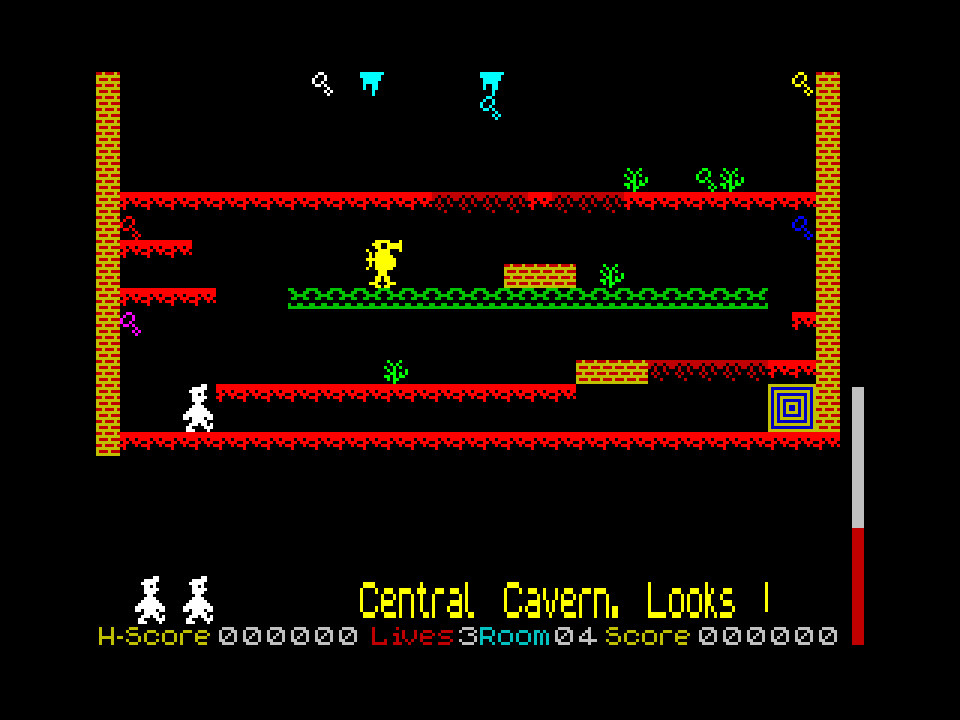
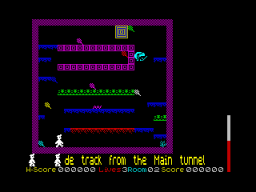
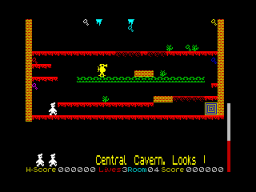
I had a good session playing this last night, and I daresay I will again tonight. I really like it, the graphics just seem eye-popping on a 4k monitor that I have my Next connected to, it just looks wonderfully colourful. In terms of what you say above, can the game be completed on 'normal'? I assume so, so apologies if that is a daft question. The File(s) are preliminary layouts, and I can do a lot of them. I have not tried all of them. I am concentrating more on what I can do, before I persevere with playing them to finality. So do not be surprised if you find a level impossible or seemingly so. It might well be so. I note too that the level designs are to be found in some of your other MM based games, the flowerpots etc. The diagonal moving sprites really break things up too aesthetically as well as gameplay wise - unless that is from a different version of MM I have played, there are so many, if so then sorry :-) The diagonal part is not unique. It was done in JSW2, it is done in JSW128VK etc. What is unique is the ability of sprites to cross over the background graphics. Not done with any other version of JSW - (I am Ignoring JSW2 because I know that that can do a whole host of things that JSW can not). Also apart from my version of manic miner, I am not aware of any version that uses a sprite mask on the 48k spectrum The Flower pots were drawn as Greek urns. The graphics are taken from Manic 40 Miner. For those graphics I designed and wrote an editor. I have now swapped over to windows 10 pro, which will not let those programs run , so unless I go back to my old computer, all room designs and graphics are done by simply typing out the data. I re-read what I had written above about the screen design in Perils of Willy earlier in the thread, and realise that it is not applicable here in a way because those screens themselves were designed originally back in the 80s when that game first came out, so have not been too altered in terms of difficulty compared to the modern mods of JSW and MM that can be so hard. Personally I think the system you have employed here is excellent and caters for everyone. I am not sure what the scrolling messages add to the early screens that a static message like a room name wouldn't add? If you read the mega long scrolling message and start playing the 1st,2nd ,3rd cavern. You will see that they are a continuation of the story. On the first cavern the scrolling message is around two and a half screens in width, difficult to place anything of that size and nature on the screen without it becoming over bearing. The larger screens take up all bar the bottom line. That is 23 screen lines, no room to place a room name. The messages do not use any other memory that is not contained in the room file. e.g. the sprites that are not used in that room are replaced with scrolling text. I do like too in later screens where the whole screen apart from the bottom 2 lines are deployed as gaming area, The playing area is the full screen bar one line on the bottom and one column on the extreme right. The area updated on each game loop is the full screen. something different from MM but it looks really good visually and gives more room for design. As for the size of the memory used above, is producing a 128k version a possibility? I do not even look at 128 spectrum versions of any game from that era. The 128k spectrum did not exist when Manic Miner/Jsw/jsw2 where written. I write only on hardware that was available at the time these games were written. Any program I write COULD have been written and release when the originals were released. The reason I ignore other hardware is because these programs are written solely for my enjoyment. With the main constraint being that they must run on the original spectrum. When writing a game in 48k the limitations of the hardware the processor and memory, dictate what can be done. Hope that this is constructive for you. ;=============================== My text is in Blue in response to text in Red. I do appreciate you taking the trouble to comment. --------------------------------------------------------------- Final game version accessible This Link
-
I have just run the file on Torinak - no problems. If you had read the start of this post and the responses I made. You will have seen that the original file used a port that when scanned can cause a problem with any spectrum version that is not the original. Implication being Torinak is not specced as an original spectrum. --------------------------------------------------------------- Final game version accessible This Link
-
Version beta 3. Not changed a great deal, that can be seen. But underneath the exterior is a lot of code change. This looks pretty much the same as before. Only casual difference would be that on loading it now displays the word "Trainer" on the title screen. Plus a change in the scrolling message about the version and the date. Game changes. While the title screen is displayed , pressing the keyboard letter "T" will change the word "Trainer" to "Normal", another press of "T" will change the word "Normal" to "Expert". And yet another press will change the "Expert" back to the original wording of "trainer". Those three words are describing the game play. The graphics of each room will not be changed by the differing level of play but other changes will take place. 1) trainer mode: Here the oxygen level is set to full, and the game depletes the oxygen counter very slowly. The number of sprites in a room is reduced by two. The game can not be completed in this mode. 2) Normal mode. Here the oxygen level is set to a level where the room can be completed at a casual pace. The oxygen depletes a lot faster. The number of sprites in a room is reduced by 1 3) Expert mode. Here the oxygen level is set to a level where the room can be completed at a brisk pace. The rate of oxygen depletion is very fast, Now all contacts with sprites/baddies/fall etc will result in Willies demise. Each mode has its own high score. The trainer mode will give excessive score due to the remaining oxygen left at the end of each cavern. The above is an outline of what is intended.... The rooms themselves have not be fully defined. in terms of graphics/sprites/events/ and the oxygen level At present around 25 screens:- that, like every other aspect, is subject to change. -------------------------------------------------------------------------------------------- Addendum:- The size of the file is a good indicator of how much ram is set aside for those giant screens in memory. The real screen is 6656 in size. For this game variant we also have a Working screen and a Master screen. Those 3 screens are using 19968 bytes of memory. So nearly 20k is dedicated at the start for game screens, leaving just 28k from the 48k for the program and all its data. I am at present at the point where I need more memory to do the things I want. I will probably do a major memory reconfiguration and data compression. (something that will not be seen) ------------------------------------------------------------------------------------------- Deleted obsolete download --------------------------------------------------------------- Final game version accessible This Link
-
I have had a thought which I will implement tomorrow sometime. I will set three levels of play. 1) trainer- How willy imagines he will breeze through the caverns. Lots of air . 2) the reality version, Just enough air to get through a cavern with no sight seeing on the way. 3) Deadly. The same time limit as 2 but where every contact kills willy instantly. - With only versions 2 and 3 actually getting to completion of the quest, Addendum 6 hours later (after a sleepless night, and I am very tired) I have implemented the 3 modes. "Trainer", "Normal" and "Expert". (terminology as used in the game text) --------------------------------------------------------------- Final game version accessible This Link
-
Level of difficulty:- The screens seen are just outline screens from screen 5 onward. I can do most of the screens easily. The ones I can not do easily I will redo. I tend to not use the obscure Manic Miner movement quirks and prefer to just set a task which can be seen and attempted in an more or less obvious manner. Since the Title is Manic Panic, I had intended to set the Oxygen level to near the time taken to do a casual run. In a move towards ease I will allow the player to set an easy level. (already done) where the oxygen is set to full for every cavern. Rather beats the sense of Panic if each room can be done whilst drinking a cup of tea and reading the newspaper. The game as written does allow sprite contact and many other instances that should result in Willies demise, with lots of oxygen at the players disposal. It will make a lot of screens complete-able whilst doing the crossword in the paper as well. Programs by me. I am responsible for nothing else. Manic miner by Bug byte and software projects. Which plays exactly the same as the original. Manic 40 Miner - a demo of 40 screens for Manic Miner- it was just to show it could be done. JSW128VK 128 rooms in 48k (changeable speed) JSW128VL 128 rooms in 48k Double speed and portals (changeable speed) JSW128VM 128 rooms in 48k -triple speed and a whole host of game options (changeable speed) In JSW128VM the game has a built in rewind function (via portals). Manic Panic is just an idea to demonstrate the capability of the game engine stretched further than Matthew accomplished. The demo as seen is one weeks work. ------------------------------------------------------ Final game version accessible This Link
-
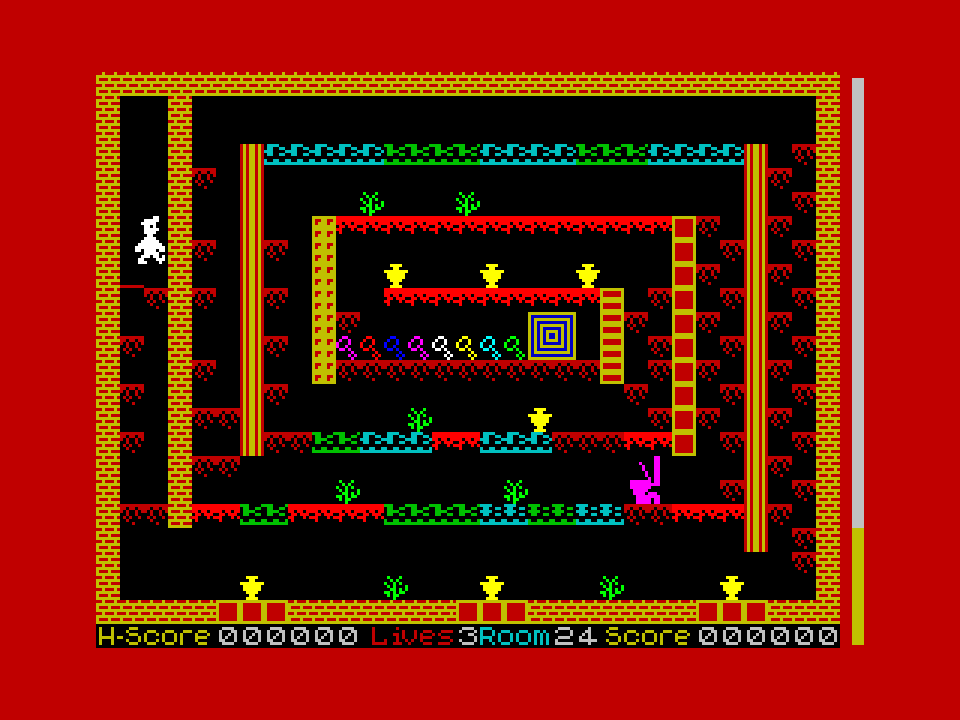
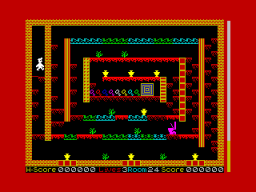
The copying of screens. Yes I could update just the areas changed. Just a lot easier to just block move. If you remember, the original logic as penned by a certain M. Smith. In that It was deemed fast enough to LDIR everything. For screen updates we have to update other areas as well . So it took a few goes at just updating the pixel area. Most routines were changed to update both at the same time. for example the conveyor routine draws to both the master and the working screen. The collapsing floor draws to both the master and the working screen. Wall removal as done by Kong's association is done on both the master and working screen. The instances were glitches showed an update was not being fully copied, forced the dual draw. Getting the code to work was enough to curtail enthusiasm to extend to the attributes as well. feedback. Update the slow attribute copy routines. :D The spiral room, which is around screen 24, is not in the file I uploaded. The final screen has been changed as well. The screens as seen can/could all be changed. ----------------------------------------------- final game version accessible This Link
-
The answer might surprise you. Guardians do not interact with anything on the screen. Guardians over fire cell- no response. Guardians over another Guardian- No response. Guardians over graphics- No response. ;------------------------------------------ Major change in design for willy and the sprites Manic miner and Jet set willy sprite logic:- (idealized model for sprite collision) 1) Willy is moved according to the program flow and keyboard activity. 2) Willy is drawn 3) The sprites are moved 4) The sprites are drawn. 5) For each sprite drawn the area behind the sprite is checked for pixel collision. 6) If a collision is flagged we exit and die else 7) copy the screen to visible screen (pixels and attributes) 8) copy the master screen (the screen with graphics, but no sprites) to the working screen. 9) copy the master attributes to the working attributes loop JSw2 uses a very different logic for most aspects of the game Jsw128 Vm uses a similar type of logic to jsw and MM but each routine is expanded and instead of part 8 we do a sprite and graphic refresh. The graphic refresh is achieved by tracking every change that occurs on the screen. And storing every change. The list of changes is used to refresh the screen. Manic panic;- does the following 1) Willy is moved according to the program flow and keyboard activity. 2) Willy's mask area is erased from the screen 3) The sprites are moved 4) The sprites are drawn. 5) 6) > Willy is drawn to the screen, checking for collisions. Any collision is flagged 7) copy the screen to visible screen (pixels and attributes) 8) > the sprites are reverse drawn: e.g. Instead of drawing a sprite we copy the master screen to the working screen for the area the sprite was in > willy is reverse drawn. e.g. Instead of drawing willy we copy the master screen to the working screen for the area that Willy was in 9) copy the master attributes to the working attributes loop The above is mainly concerned with sprite collision, of course lots of other bits and pieces. Concerning updates to conveyors, walls erased, item key flashes and portal update, oxygen depletion etc. also take place. The sprites themselves are treated as a moving graphic on the screen. They do not check for anything when drawn. This brings collision detection more in line with JSW2. And using this method I could do eggoids from JSW2 The above is the basic logic change. The program itself does most aspects which can be described by the same action in differing ways. For example the screen copy progression from version to version MM and JSW a simple LDIR JSW128Vk raster copy using ldi (originally) JSW128VL stack copy JSW128VM stack copy and the whole of memory reorganized to removed memory contention while copying. ( a very big change) Manic 40 Miner stack copy and the removal of memory contention for screen copying. Manic Panic stack copy and the removal of memory contention for screen copying. ;------------------------------------------------------------------------- Final version accessible This Link
-
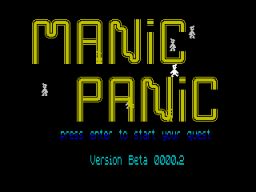
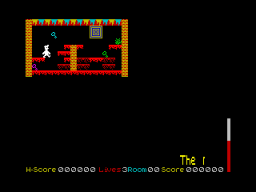
Whilst I was aware of the technicalities of the loader from Technician Ted, never felt the need to load the game and watch it. The TITLE screen in this program (as above) is about the tenth version. And the basis of what you see is simply the game it is based on. A lot of screens have horizontally moving sprites. I duplicated a screen for the title screen. Then reduced the sprites to only one (Willy). Then removed the diagonals. then the colour. The overall plan was to give no clue as to what you will later see. For example after the mega long scrolling message the program will do a manic miner style flash past of all the screens that you have played (plus the first). It will not reveal un played screens. The more screens played, the more that are included in the demo loop. I have no plans on uploading multiple versions, especially since I have tested the program without the port read on the +2a etc and it runs. The generosity of oxygen will make a lot of the screens very easy. This supply of oxygen will not end up as generous when I finalise the screens. When the program runs for each cavern it initialises a counter. For every game loop it increases the counter. When the portal is entered I can display the counter. Which is the time taken to complete a room. The final oxygen level will be set to the value of the counter plus a small amount. (the counter and its display output are one of the multitude of in program routines, which are in the program, waiting to be deleted on finalisation)
-
Technical info:- The oxygen meter has a progressive rate of depletion. The lower the level the faster it moves. The oxygen depletion caused by any of the normal death instances, causes a fixed amount of oxygen depletion. What this means is a touch of a sprite at the start of playing a room, will have much more of an effect than the same touch near completing a room. When the true oxygen levels are set. any contact/death noise near the start of playing a room, will tend to make it impossible to finish the room. Each type of contact with a sprite/baddy/ or fall will deplete the oxygen by an amount that is fixed for each type of touch/fall. Sprites can pass over any other sprites. Sprites can pass over anything on the screen. Willy is now drawn with a sprite mask Sprites correctly colour in the background Each room can be constructed of 16 differing tiles. A development from Manic 40 Miner Rooms can have ignore tiles. A development from Manic 40 Miner A proportionally spaced double height scroll routine is used. Rooms can be defined as any size to fit the screen. (or part of) nine baddy sprites per room eight objects per room Sprites can be mixed in any combination old style events such as eugene/kong/skylab are sprite definable and not room events. sprites can move diagonally. all sprites have a vertical and a horizontal component. (excepting kong/skylab/eugene) ------------------------------------------------------------------------ final version accessible This Link
-
I know exactly why this program will not run on other machines. It concerns the way the hardware ports are read. One reason I was reluctant to include the routine. (it stops judder- or helps to) - I can remove and permit the judder instead. Regarding the Title screen - Never loaded Technician Ted on a computer, so never seen the title screen. from that game. On a real (original) spectrum it is possible to read the screen attributes. On the various updates the port/ula was changed and the ability to read the port was removed. It is the reason several games will not run on newer hardware. Final comment on the hardware - I removed the routine that was added and was scanning a port. The original version ran a lot faster. And the speed made the Title screen Judder. Over several versions, it was deliberately slowed down. The difference in speed between what is seen and the original is considerable. The present slow version has no need for the port scanning routine. ------------------------------------------- Final version accessible via This Link
-
This file is mostly playable. It is NOT the finished product, and basically I am posting here for feedback. In most caverns you are given far too much oxygen. The oxygen level has not been definitively set. No music routine playing. It needs music- It contains enough space for music routines. No loader screen. various screens from game. Title screen Intro screen - 16 wide / 9 high = 144 tiles Trainer screen - 22 wide / 16 high = 352 tiles Peril size screen - 20 wide / 19 high = 380 tiles Manic style screen - 31 wide / 16 high = 496 tiles (normally 512 tiles) Game playing screen - 31 wide / 23 high = 713 tiles After a week the file that was here- was deleted. The file was downloaded 11 times. 7 posts in the week that followed. ;---------------------------------- The final Version which is playable is:- This Link

-
Talking about the Final Barrier in Manic Miner. and graphic matching using the CPIR code. (re write to clarify) 1) When the final barrier is drawn. The top part of the room contains graphic data. Which is also interpreted as the colours for the room. The room is then expanded out after matching these graphics colours. They are colours from the picture, but the room draw routine will interpret tham as room graphics The colours are not intended to match the room graphics, they are the colours of the picture but the CPIR routine will still try to match the colours. From memory I think the top graphic data has more than 9 differing colours. Checking one of my source code lists . The top part has around 18 differing graphics- so in every case the graphics will not match the room graphic colour data. So in every case this would. if unchecked. possibly scan all memory. 2) If the CPIR steps past the last known graphic, and onto stair data etc. Then it indicates that the loop should be shortened to stop on the last known graphic,
-
I will correct the notion that it does a search. It uses an algorithm that does not do any searches. it places known data from a fixed position into a fixed position. It also removes the major bug that stops duplication of colours that should allow differing graphics, if specified. E.g. in JSW (out on a limb) we specify a stair and a platform to have the same colour. Using the method I use will allow a stair to be drawn as well as the platforms. NONE of the methods listed elsewhere will permit this to happen
-
The portal routine as now:- Used by the routine at 870E. First check whether Willy has entered the portal. 8FC5 LD HL,($80B0) Pick up the address of the portal's location in the attribute buffer at 5C00 from 80B0 8FC8 LD A,($806C) Pick up the LSB of the address of Willy's location in the attribute buffer at 5C00 from 806C 8FCB CP L Does it match that of the portal? 8FCC JR NZ,$8FDF Jump if not 8FCE LD A,($806D) Pick up the MSB of the address of Willy's location in the attribute buffer at 5C00 from 806D 8FD1 CP H Does it match that of the portal? 8FD2 JR NZ,$8FDF Jump if not 8FD4 LD A,($808F) Pick up the portal's attribute byte from 808F 8FD7 BIT 7,A Is the portal flashing? 8FD9 JR Z,$8FDF Jump if not 8FDB POP HL Drop the return address from the stack 8FDC JP $9028 Move Willy to the next cavern Willy has not entered the portal, or it's not flashing, so just draw it. 8FDF LD A,($808F) Pick up the portal's attribute byte from 808F 8FE2 LD (HL),A Set the attribute bytes for the portal in the buffer at 5C00 8FE3 INC HL 8FE4 LD (HL),A 8FE5 LD DE,$001F 8FE8 ADD HL,DE 8FE9 LD (HL),A 8FEA INC HL 8FEB LD (HL),A 8FEC LD DE,$8090 Point DE at the graphic data for the portal at 8090 8FEF LD HL,($80B2) Pick up the address of the portal's location in the screen buffer at 6000 from 80B2 8FF2 LD C,$00 C=0: overwrite mode ;-------------------------- The changed code preceded by -. on each line -.8fc5 ld de,(#80b0) ; portal address to de -.8fc8 ld hl,(#806c) ; will att to hl -.8fcb or a -.8fcc sbc hl,de ; a collision sets the zero flag -.8fce ex de,hl -.8fcf ld a,(#808f) ;the portal colour -.8fd2 jr nz,part2 -.8fd4 pop hl ; we clear the stack -.8fd5 bit 7,a ; decide if portal or death -.8fd7 jp nz,#9028 ; next cavern -.8fda jp #8d0f ; the kill routine -.8fdd nop ; spare 5 bytes -.8fde nop -.8fdf nop -.8ff0 nop -.8fd1 nop part2 8FE2 LD (HL),A Set the attribute bytes for the portal in the buffer at 5C00 8FE3 INC HL 8FE4 LD (HL),A 8FE5 LD DE,$001F 8FE8 ADD HL,DE 8FE9 LD (HL),A 8FEA INC HL 8FEB LD (HL),A 8FEC LD DE,$8090 Point DE at the graphic data for the portal at 8090 8FEF LD HL,($80B2) Pick up the address of the portal's location in the screen buffer at 6000 from 80B2 8FF2 LD C,$00 C=0: overwrite mode ; the problem that I see with doing this is the vagueness of the collision detection. An outline :- subject to typing errors and miscalculations. plenty of space to fit the code.
-
The routine is still playing a linear keyboard. The only changes are the compression of the data, the redrawing of the keyboard, the full key light up and removal of the silent keyboard light ups. Long time since I looked at the routine. A quick glance does indicate I could change to a key reference lookup quite easily. E.g. permit each note to designate a value for its true key position. Not something I would bother to do.
-
Having no memory to change the code, has made progress very very slow. Which adds to a lack of enthusiasm from me. For every idea I can think of, no matter how small. A change is needed in the main code to allow the addition of extra code to permit the idea to take place. This would have been far easier if I had not included a part editor... Which took all the the space normally used to expand game ideas. The file included here, is included solely for the changes I have done to room 23. Whilst other code changes have taken place. They are not visible or have little effect on what is experienced. Room 23 whats in it that's different to Manic Miner This room has a moving light beam Has a moved Eugene, different graphics. This Eugene routine can specify which item Eugene reacts to, or reacts when all collected. This room has multiple Kongs Each Kong can define where it removes a wall section from Each Kong is movable in position Each Kong has a definable drop Each kong has a definable definition. (no other definition is provided in this file) Each Kong has a definable colour Has a skylab Skylab moves upward - definable either way Skylab has a definable crash sound - definable from 4 Skylab has a definable image and animation stages (not provided in this file) Skylabs can step backward or forward Note most of the above can not be changed via the limited game editor: I am demonstrating what can be done. Or more specifically what I can change. -------------------- Addendums:- problem solving to be completable 17th August 2021 : Manic 40 Miner V6c1.tap modified room 21 - removed the conveyor collapsing floor added an extra collapsing floor just above the portal ================================ 17th August 2021 : Manic 40 Miner V6c2.tap modified room 21 - added an extra collapsing floor just above the portal collaspsing conveyor floor left as in V6c ============================== Game completeable version V6C6 - this allows the game to be played through all 40 caverns, without editing. Manic 40 Miner V6c6.tap
-
I think this might be the final version. Listed as Complete game .... I have not uploaded it to verify https://highriser.itch.io/the-perils-of-willy?fbclid=IwAR0qnZNHEXY9hQHEar6tVZWNU-6N_kcCpvCwiaoN8S5eOFsVyy7M2HP6m2U
-
Try the above or the below - both the same https://www.dropbox.com/s/icnp3lby4xfdzin/PerilsOfWillyDemo1.zip?dl=0&fbclid=IwAR22yghpOlmRHGUGaP6XHcQXlQ4vUNxctXIhzSBpy3LndmizuSoCrVDHkgY
-
The program has progressed. The demo as mentioned above : via a drop box - THIS IS A Z80 zx spectrum game file - playable https://www.dropbox.com/s/icnp3lby4x%E2%80%A6/PerilsOfWillyDemo1.zip'>https://www.dropbox.com/s/icnp3lby4x